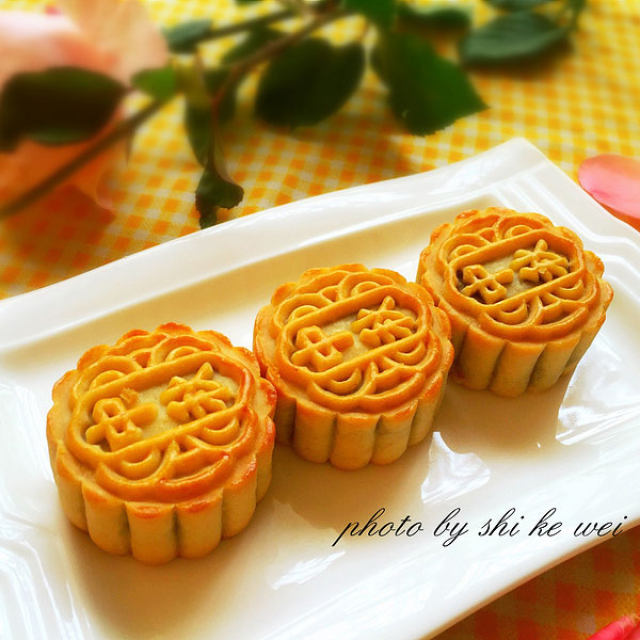
Cantonese Red bean soup Moon Cake
2024-04-10 16:13:36 184

Details of ingredients
Technique
Steps to make Cantonese Red bean soup Moon Cake
- 1. First, make the bean paste filling. Wash red beans. Add enough water to the red beans, put them in a pot and bring to a boil over high heat. Cook over low heat until soft and tender (I used a pressure cooker to press for half an hour).
- 2. Cook until thoroughly soft and tender, without any feeling of hardening.
![]() 3. Add water to the cooked red beans, put them into a food processor, and beat them into a delicate paste (the amount of water added depends on the actual situation. Adding too little water will make it difficult to stir, and adding too much water will make the paste thinner, which will take more time to stir fry later)
3. Add water to the cooked red beans, put them into a food processor, and beat them into a delicate paste (the amount of water added depends on the actual situation. Adding too little water will make it difficult to stir, and adding too much water will make the paste thinner, which will take more time to stir fry later)- 4. Because cooked flour is used in the filling, we make some ourselves. Heat the frying pan, put in glutinous rice flour, and continue to stir until the glutinous rice flour becomes slightly yellow and tastes like raw flour. (We can stir more of this, because it will be useful for hand flour or powder spreading in molds later.)
- 5. Let's use the ACA scale to weigh the peanut oil, sugar and cooked glutinous Rice noodles used in the filling.
- 6. Add all the sugar, heat over medium heat, and stir fry until the sugar dissolves.
- 7. Continue to stir fry over medium heat, adding peanut oil in three portions during the process. Stir fry until the oil is completely absorbed by the bean paste before adding it again.
- After adding peanut oil, continue to stir fry and slowly dry the water. The filling is getting drier and drier as it is stir fried. When stir frying until very thick, add cooked flour and continue to stir fry until the flour and filling are evenly mixed.
- 9. It is recommended to lay the stir fried filling flat on a large plate to quickly cool it down. Make sure to stir fry the filling dry.
- 10. Next, let's make a pastry crust. Weigh the required materials in full using ACA's small scale.
- 11. Convert syrup, pour peanut oil and water into a bowl, and stir evenly with a manual egg beater.
- 12. Sift the flour into the syrup and mix well with a scraper to form a dough
- 13. The freshly mixed dough is very sticky. Wrap the dough in cling film and refrigerate for at least 1 hour before use.
- 14. Weigh the filling and skin as needed. The ratio of skin to filling for the mooncake I made is 3:7. For example, if your mold weighs 50 grams, divide the skin into 15 grams per serving and the filling into 35 grams per serving.
- 15. Place the round crust in the palm of your hand and press it flat, then place the filling on top of the crust. (As the packaging method was the same, I didn't take a picture and instead used another recipe for making mooncakes.)
- 16. Using the tiger's mouth on my right hand, slowly push upwards, and hold the bottom and top with my left hand to slowly rotate. (Since the packaging method is the same, I didn't take a picture and directly used another recipe for making mooncakes.)
- 17. As shown in the figure. Slowly push the skin upwards until the filling is completely wrapped. (As the packaging method was the same, I didn't take a picture and instead used another recipe for making mooncakes.)
- 18. Wrapped mooncakes can be gently rounded.
- 19. Put it into cooked glutinous Rice noodles and roll it for a circle, then put it into the mold to press. Or sprinkle some cooked glutinous rice flour in the mold, cover the mouth of the mold with your hand and shake it to make the flour attach to the mold, and then pour out the excess flour. Just put the mooncakes in and press them down, let's see how convenient it is for you.
- 20. Use a mold to press out the pattern you like. (Oil paper can be placed on the baking tray and pressed directly onto it.)
![]() 21. Before sending mooncakes into the oven, spray some water above the mooncakes. (As I forgot to take the picture, I used the picture I took from another batch of mooncakes before.)
21. Before sending mooncakes into the oven, spray some water above the mooncakes. (As I forgot to take the picture, I used the picture I took from another batch of mooncakes before.)- 22. Send the prepared mooncakes into the ACA oven. The temperature used in my oven is 175 above heat and 140 below heat, and bake for 5 minutes. Take them out and let them cool for a while
- Brush a layer of egg yolk water and put it back into the oven for about 20 minutes
- 24. Baked mooncakes, after cooling, seal and store for 2-3 days. The crust will gradually become soft and oily, and this process is called "oil return". The color of the mooncakes after oil return will be even more beautiful!
![]() 25. Attached are the finished product drawings...
25. Attached are the finished product drawings...- 26. Attached are the finished product drawings...
- 27. Attached are the finished product drawings...


